
Security Fest 2018 Challenge Badge & Prize Assembly
At this year’s Security Fest fellow security enthusiast Weckzén (@Wecksten) had created a challenge badge since he (rightly) believe that every con needs a challenge badge. I solved the challenge badge, got a prize from him in the form of a Pimoroni Pirate Radio which I assembled and documented here.
The Challenge Badge
The challenge badge was a fairly simple looking circuit with two buttons, four DIP switches a USB connector and two LEDs.
![]()
Inserting the board into a computer identifies it a HID device and a serial interface. Pressing one of the button types out the following text via the HID interface:
Welcome to the Bug Bounty Hunter Swedens Challenge Badge!
All the great conferences have extra badges and all the badges are tied to a great community, so here we are!
The BBH Sweden slack have been great fun over the years and I wanted to give something back.£££
This badge is loaded with a Arduino Leonardo bootloader, so you can treat it straight up like a Arduino clone. The difference as you might see is the PID switch. We have open sourced it and I will be putting up more information how you can modify it yourself soon! Check out the code at https://github.com/znibb/SecBadge how to interact with all the features. It can be a bit finicky to get everything to work and fit everything in so don’t worry, ask for help and read the examples!
Happy hacking and thank you for making the community a better, funner place!
//WeckzenP.S Huge thanks to Zkylark Electronics with all the help with the badge. If you are interested in getting any custom hardware done, hit them up!
Toggling the first DIP switch and pressing the button again gives this message instead:
I saved /ch1.txt! I did! I would get it myself but I. n’t re. b r wh. e. ome i. any ore. … :()
Moving on to the next switch gives this message:
—–BEGIN PGP PRIVATE KEY BLOCK—–
Version: GnuPG v2lQOYBFsQIJMBCACpi463WY6z0jM00s4g15wFPCrRix42VjXg3CqRIBTK3RMJixkn
3t8BCd9QARrKGnskq/EemztB4C83wNtsdk16LYoSsKWI2+o2H6hjtPthp7j7xgNa
WosyCbkpcEgFM4vMyETbxBDoTJyZ+JdgGuAxl1p6Z3DMvqZtjAovCgXdQxMntrRi
fBpADq4hFwPdWVsgrPYl86Mdl16puIWHRa4k3MNuGoS32zEGvLmnBGS7RN++QIHd
/y29DiMtm5kXimnnBBkeNEQLIV9BEETtBZDN1ysEgM1mKuD/fyvVjjs9/ZfJDL66
krnEpUuOBJFlduwtLbY0kp9UG8GjmmGQQtldABEBAAEAB/41iSG5d4f99APDTEVW
TX6wkH0cyYbytWox5JN0W+L047XdL5Tz6AYWt91Rz+d7pbz4qWprtaySco22Vyly
KDDywWp12F2Mx5Q/HuP3B/DQtztMFQx9/VUyqatUEGZNbidYtGw50MFd+MMCQ2LZ
L+NXBWnGeN8/Z3v531xf2hRb9wyFLn7tt/sUvfhniLrsztKijEB1T5hdw4Xx4wyh
lkDlc5dYe0u589nQHMzbfRGK/eE1ZSvThIGDOyAnnYrY37uHZQxPEdh+EIqGti55
QQfqGftNVvw+UfB4JH39HfzPonJauCd1B1hZ3GaCpk1SpzpGxtwV6dY5AbLez872
qVlpBADPiP5Hueo0RY/FfPft9WDBqRvLk/sZRBzN0ISLWymj0YQzzTvU6WlRp57T£££
OUT OF MEMORY — REBOOTING!
SOME DATA WAS LOST!
THE LOST DATA WAS SENT HOME!
RECOVERY SUCCEDED!
RESTARTING!
£££=V6y8
—–END PGP PRIVATE KEY BLOCK—–
The fourth message reads:
Apparently it is super important that I tell you that I don’t write in Swedish! So if my text looks garbled I am blaming U! K?
But don’t worry, I have something nice for you too! It’s called a /ch2.txt! But… I seemed to have left it at home. Sorry! Maybe you can find it for me?
Finally flipping the final switch and pressing the button gives us this:
Im writing but seemingly no one is listening.
Have not even had breakfast yet. Maybe I will get some Cereal
You should too!
Get it? Cereal sound like Serial. Listening on the serial interface with for example picocom and pressing the button gives the following message.
There is no place like 127.0.0.1. In my case that is at 95.215.46.212!
Combining the IP address with the paths from the messages we can download two files. The first file contains a PGP encrypted message encoded in hex. The second file contains the second half of the PGP key base64 encoded a couple of times. Decoding the file a few times, combining it with the part in the message and importing it to GPG allows us to decrypt the message. Basically, the following script solves the challenge.
wget http://95.215.46.212/ch1.txt
wget http://95.215.46.212/ch2.txt

cat <<EOF > keypart1.txt
-----BEGIN PGP PRIVATE KEY BLOCK-----
Version: GnuPG v2

lQOYBFsQIJMBCACpi463WY6z0jM00s4g15wFPCrRix42VjXg3CqRIBTK3RMJixkn
3t8BCd9QARrKGnskq/EemztB4C83wNtsdk16LYoSsKWI2+o2H6hjtPthp7j7xgNa
WosyCbkpcEgFM4vMyETbxBDoTJyZ+JdgGuAxl1p6Z3DMvqZtjAovCgXdQxMntrRi
fBpADq4hFwPdWVsgrPYl86Mdl16puIWHRa4k3MNuGoS32zEGvLmnBGS7RN++QIHd
/y29DiMtm5kXimnnBBkeNEQLIV9BEETtBZDN1ysEgM1mKuD/fyvVjjs9/ZfJDL66
krnEpUuOBJFlduwtLbY0kp9UG8GjmmGQQtldABEBAAEAB/41iSG5d4f99APDTEVW
TX6wkH0cyYbytWox5JN0W+L047XdL5Tz6AYWt91Rz+d7pbz4qWprtaySco22Vyly
KDDywWp12F2Mx5Q/HuP3B/DQtztMFQx9/VUyqatUEGZNbidYtGw50MFd+MMCQ2LZ
L+NXBWnGeN8/Z3v531xf2hRb9wyFLn7tt/sUvfhniLrsztKijEB1T5hdw4Xx4wyh
lkDlc5dYe0u589nQHMzbfRGK/eE1ZSvThIGDOyAnnYrY37uHZQxPEdh+EIqGti55
QQfqGftNVvw+UfB4JH39HfzPonJauCd1B1hZ3GaCpk1SpzpGxtwV6dY5AbLez872
qVlpBADPiP5Hueo0RY/FfPft9WDBqRvLk/sZRBzN0ISLWymj0YQzzTvU6WlRp57T
EOF

cat <<EOF > keypart2.txt
=V6y8
-----END PGP PRIVATE KEY BLOCK-----
EOF

xxd -r -p ch1.txt > message.gpg

rm ch2.dat; base64 -d -w 0 ch2.txt > ch2.dat; for i in {0..4}; do base64 -d ch2.dat > ch2.dat2; rm ch2.dat; mv ch2.dat2 ch2.dat; done
cat keypart1.txt ch2.dat keypart2.txt > key.pem
gpg --import key.pem

gpg -d message.gpg > ch1.dec.txt
cat ch1.dec.txt
Which gives us this message and the challenge is solved!
Congratulations on solving all the puzzles!
If you send an email to:
<redacted>@gmail.com
With the magical word:“Does rubber ducks eat rubber bread”
as the topic together with an address (physical) I will be able to send you a RPI Zero W.
If you prefer to not claim the prize you can also give it away.
Or if you don’t want to give out your address you can also get it at the next Sec-T/Security Fest/OWASP GBG Day event.
Thanks for Weckzen for a simple but nice challenge.
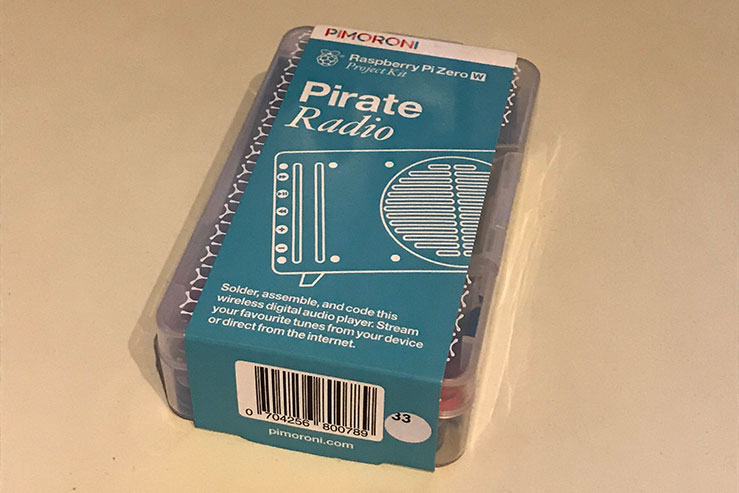
The Prize
A couple of days later I received this cute little kit. A followed the assembly guide from their website.
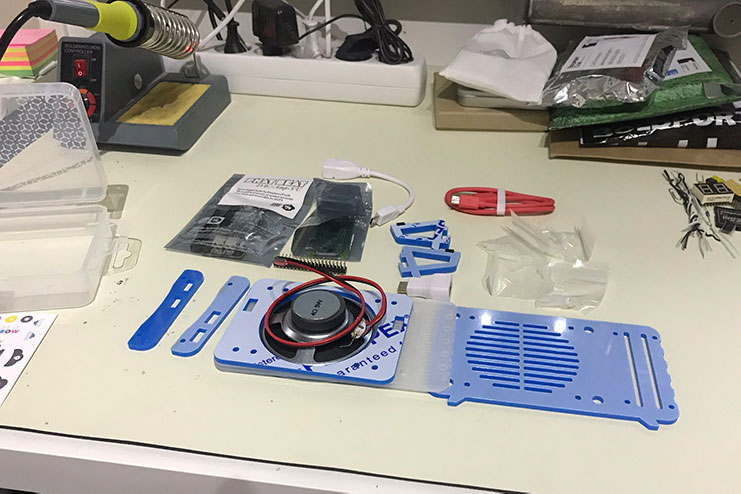
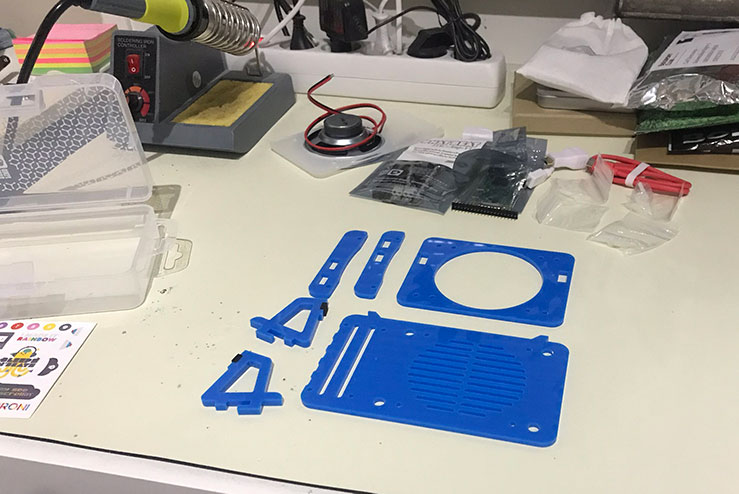
First, let’s lay out all the parts:
Start with the chassi, remove the plastic covers:
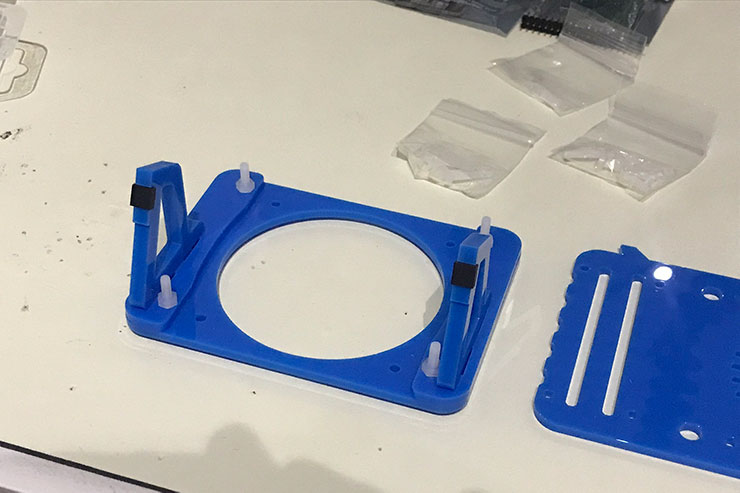
Use the neat little plastic nuts and bolts to assemble the frame and legs:
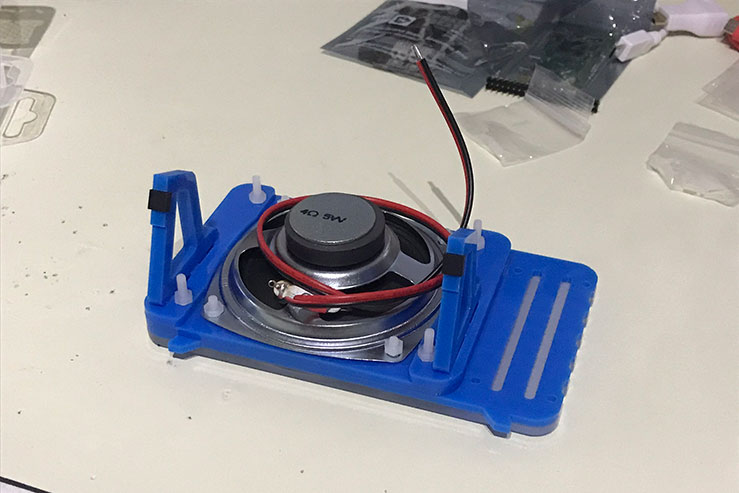
Then add the speaker and fasten it with the nuts and bolts:
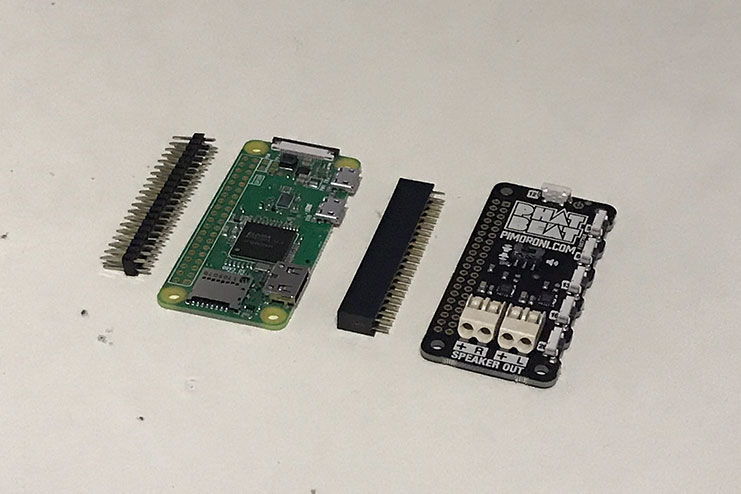
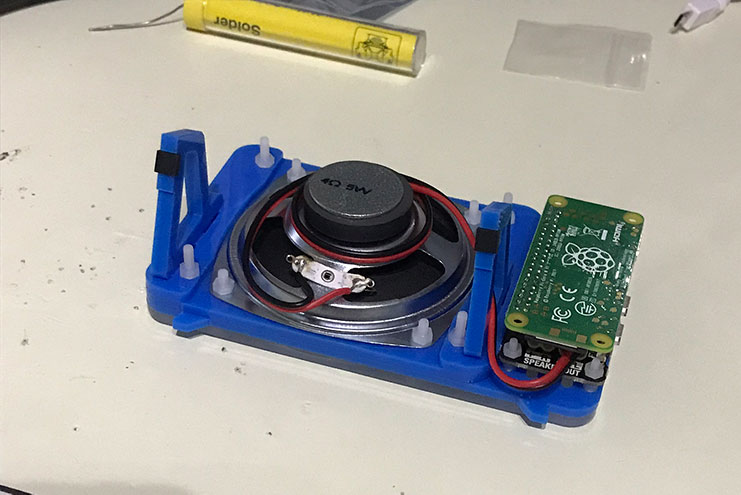
The Pi Zero W and the DAC with accompanying headers:
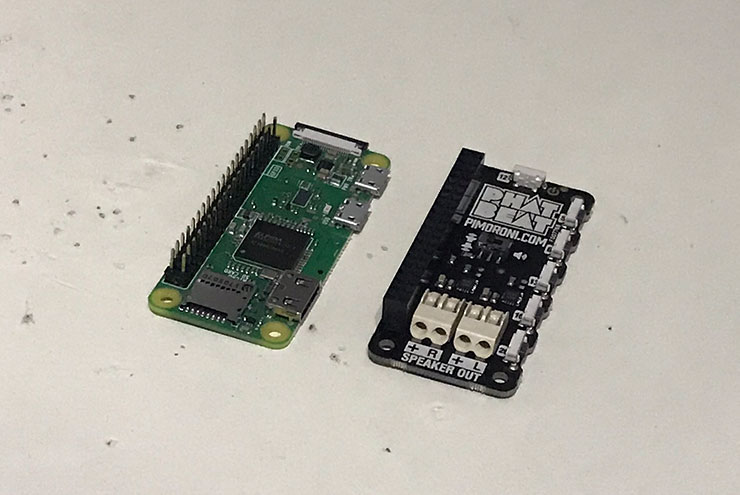
Soldering them in place to prepare for final assembly:
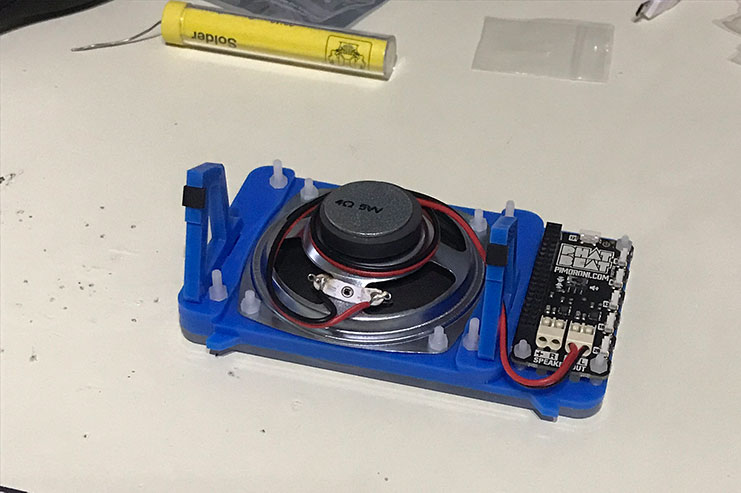
Mounting the DAC and connecting the speaker:
Finally, mounting the Pi Zero on top:
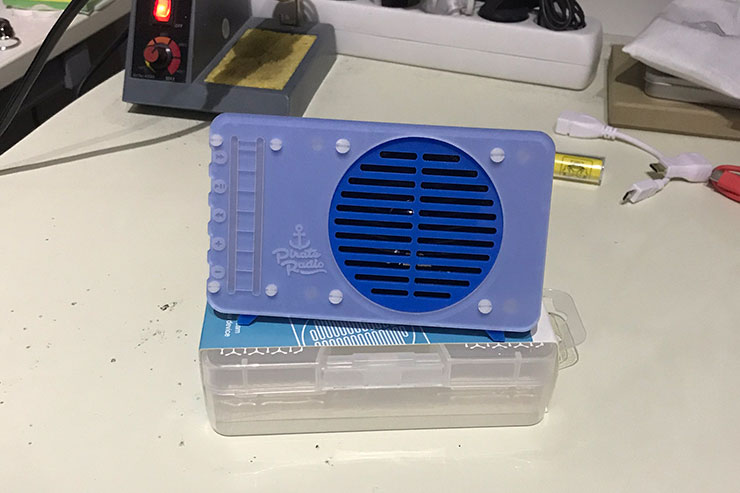
This completes the assembly of the radio:
I have just recently started doing some home automation with Philips Hue and Alexa. This will be a perfect component for some audio related parts of that.
Conclusion
There isn’t that much more to say. Thank you Weckzén for a nice little challenge and a beautiful prize and thanks to the Security Fest organizers for a great conference!